Originally posted on September 22, 2021 @ 7:01 am
Cheese making is an art form that requires skill, patience and the right tools to produce delicious results. One of the key pieces of equipment for successful cheese-making is a cheese press. A cheese press helps you shape your cheese into the desired shape with even pressure while allowing moisture to drain away from it. With so many options on the market today, choosing a quality cheese press can be daunting.
Fortunately, we’ve done all the hard work for you by researching and testing some of the best presses available right now. From manual presses to electric models, here are our top picks for the best Cheese Presses available in 2023!
Table of Contents
What is a Cheese Press?
A cheese press is a device that, in the simplest form, applies pressure to curds in order to remove whey. More complex devices can also heat, stir and separate curds.
A cheese press can be as simple as a wooden box with an interior frame to which weight can be attached. The earliest presses were probably rocks placed on top of softer cheeses, which eventually produced the similar results in terms of final texture.
Nowadays many kinds of presses are used but most commonly they are either stackable moulds where both halves are adjustable for pressure or an actual rack containing round holes into which molds fit.
Pressing usually takes place soon after the coagulation stage (curdling) of cheesemaking; once the cheese is firm enough, it is pierced to release any trapped gas and then placed in a press. In modern cheesemaking, the curd may be chopped or ground first so that it will better expel whey during pressing.
Features Of The Best Cheese Presses:
1. Durability: Quality cheese presses are usually made with strong materials such as stainless steel, which is both rust-resistant and long-lasting. This ensures that your press will continue to work well for many years.
2. Adjustable Pressure: The best cheese presses can be adjusted to provide the appropriate pressure needed for different types of cheeses. This will ensure that you get the perfect texture each time you make a batch of cheese.
3. Easy To Clean: Cheese presses should be easy to clean after use so that they remain sanitary and safe to use multiple times without fear of contamination. Look for models with removable plates or surfaces that can be easily wiped down between uses.
4. Easy To Use: A good cheese press should be easy to use, even for beginners. Look for models that have a simple design and clear instructions on how to operate it effectively.
5. Temperature Control: The best cheese presses come with temperature control features, which will allow you to regulate the temperature of the press while pressing your cheese. This ensures that you get an even, consistent texture each time you make a batch of cheese.
6. Affordable: Quality cheese presses don’t have to be expensive! There are many affordable options out there that provide excellent value for money and still offer all the features mentioned above. Be sure to shop around and compare prices before making your purchase.
Reviews of The 7 Best Cheese Presses in 2023
Here are top rated cheese press for sale
1. PetriStor 16-inches Cheese Press Kit
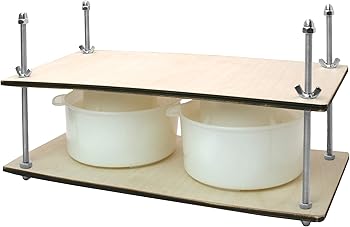
Our first product of choice is the cheese-making kit by the PetriStor brand. This brand is well known for its excellent products, and its cheese press is not an exception in terms of its product standard.
Furthermore, the product is versatile, and you can use them for various other functions in the home. These include squeezing fruits to extract their juice. It is specially made with the best materials such as natural wood and plywood resistant to moisture. Hence, your cheese press is protected against damage from water and by default, insects.
Lastly, it has a simple but classic design. With this cheese press, making different forms of hard cheese such as Gouda, Cheddar, Monterey Jack, and Parmesan becomes very easy. You can also use them to make soft cheese and semi-soft cheese.
2. PetriStor 12″ Cheese Press
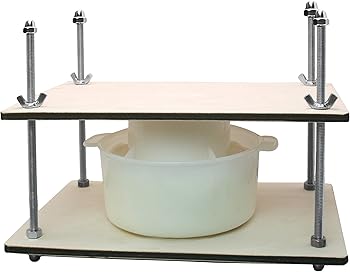
This cheese-making kit is another fantastic product from our favorite cheese press maker; the PetriStor 12″ cheese press is what you need to make a variety of your favorite hard cheese recipes. With it, making Cheddar, Parmesan, Gouda, and Monterey Jack becomes easy and fun.
The product is produced with natural wood and metal lining its edges. It is 12-inches long with a weight of 2.2lb. It can house a form with a piston that measures a total of 17cm in height, making it a perfect option for you to use. You can also use it to extract juice out of fresh fruits and other uses.
Lastly, you can use them to make soft cheese, hard cheese, and even semi-soft and blue cheese.
3. PetriStor Cheese Making Kit
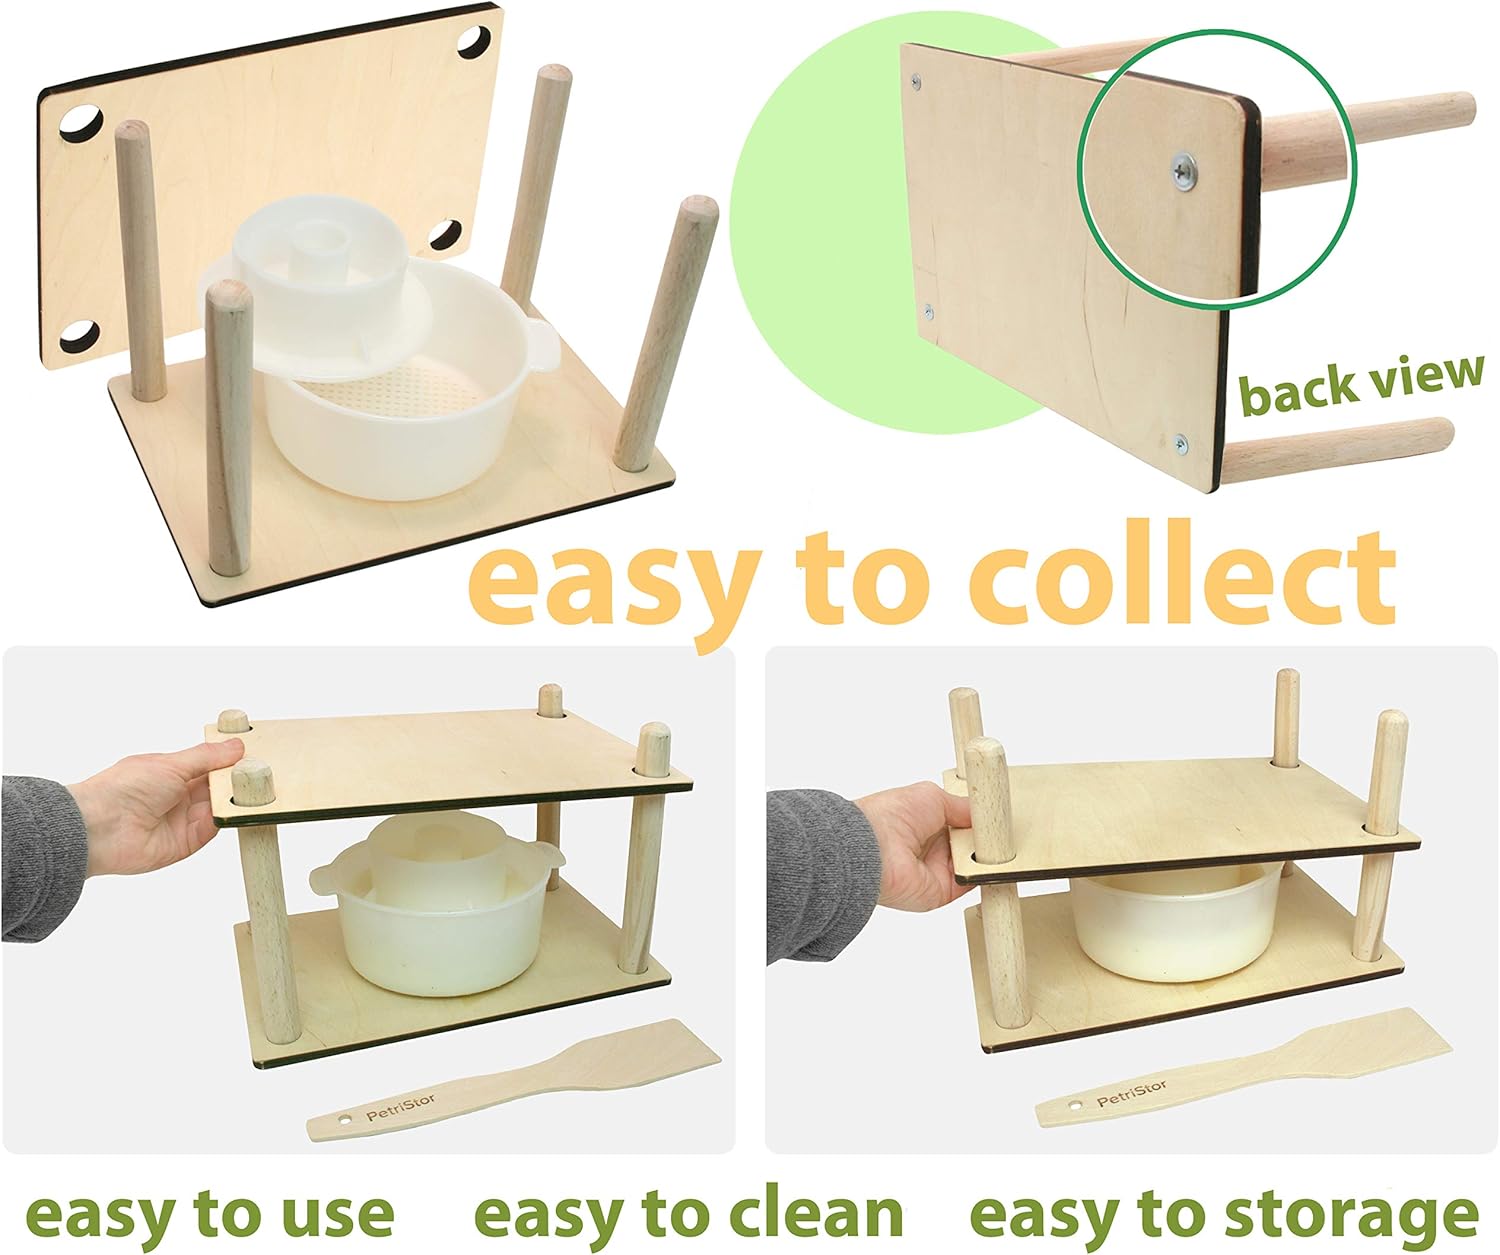
This kit from the PetriStor comes with a cheese press and one cheese-making mold that measures 1.2L. It is small in size and perfect for making cheese in homes. This product can also be used to carry out other functions. These could include juice squeezing and other uses.
It is made with natural wood and plywood and fortified to provide resistance against moisture. It, therefore, protects the product from attacks by insects. Besides, the product has a cheese form with a piston made using high-quality polypropylene material.
The product is ideal for making cheeses with mold. It is therefore perfect for preparing soft cheese, semi-soft, hard cheese, and blue cheese.
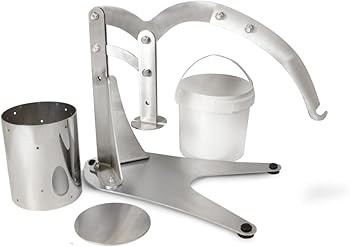
4. EJWOX Cheese Tincture Manual Press
This cheese press can save you time and energy. It allows you to carry out a variety of functions as you prepare your cheese. The mode of operation is also easy and clean. This is because the product has a T handle a unique design that allows users to operate without any form of stress.
With it, you can squeeze out the juice in vegetables and fruits. They also help you extract honey and also compress bee wax. They are thus suitable for making cheese and acting as tinctures for making wine or squeezing oil.
Finally, this product is very healthy and safe to use. They are handmade from recyclable materials and are thus environmentally friendly. It also has a minimal oxidation rate making it one of the best cheese presses for sale.
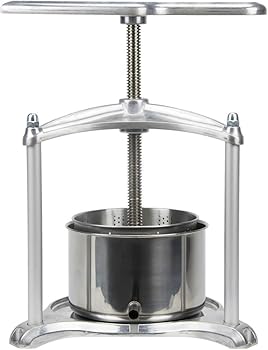
5. SQUEEZE Cheese Tincture And Wine Press

If you are a lover of colors like me, then you should purchase this cheese press immediately. They are pleasing to the eyes and would be beautiful sitting on your kitchen shelf. Aside from their aesthetic appeal, they are also durable and have an energy-saving design. The model and operation mode is fantastic;hence, it is one of my favorite cookie press for cheese straw.
With this product, you can also make healthy and nourishing fruit juice. You can also use it for pressing vegetables like carrots, spinach, and others. And guess what; they work silently, free from disturbing and distracting noise. Lastly, the production material is stainless steel, which makes it easy to clean after use.
6. The Sausage Maker Chess Press
This cheese press comes with a gauge. It has a pressing power of 50 lbs created when you hang about 12.5 lbs from its arm. This is because of the well-built arm with an attached notch that makes hanging comfortably and easy. Hence, the design provides a weight with a 4-1 ratio.
In addition, the product is made with the finest of materials, such as 11ga stainless steel (used for the frame). It also comes with an 18ga cylinder and a follower. With these items, you are sure of having a powerful cookie press for making cheese straw with its hygienic tools.
Finally, they are easy to wash after use, and should the need arise: you can easily disassemble them using a screwdriver.
7. Sausage Maker 6″ Cheese Press
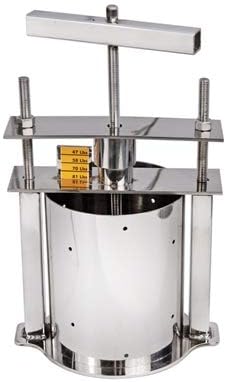
This Cheese press is the last item on our list. It is from the Sausage Maker brand, and like the one above, they are also high in terms of quality and delivery. The cheese press comes with a pressing power guide; this feature makes the product a fantastic tool used to press and shape cheese.
In addition, the product has a spring for carrying out precise compression. It is made with high-quality stainless steel, making it durable, ensuring you retain value for your money for a long time. Stainless steel is also food safe, so you need not worry about chemicals in your food.
Besides, it comes with a follower and a perforated mold. Usage in cheese production is therefore easy, and afterward, it is equally easy to clean the surrounding areas.
How Do I Choose The Best Cheese Presses?
And when you finally decide to make your own cheese, it is time for the cheese press.
The Cheese Press is typically a heavy weight flat plate with a screw mechanism that presses wheels of cheese into blocks or other shapes. You can get them in many different sizes and designs. But what kind of cheese press should one choose?
This article will give you some guidelines on choosing the best cheese press.
Weight
First factor to consider is weight. The heavier the better, because it means that it will not move around while pressing down into the wheel of cheese. If you are making more then one type of cheese at once, this feature comes highly recommended.
When searching for the ideal price/weight ratio remember to take an average kilo per liter into account. Most presses have from 2 to 8 liter capacity, so a 5 kilo press with a 4 liter capacity will most likely be the most popular model.
User-Friendliness
Second factor is User-Friendliness. A large part of cheese making consists of cleaning and waiting for things to mature. A lot of cheese presses are designed in such way that it makes these actions as easy as possible.
Look for features like: detachable screw mechanism (it can wear out and needs replacing at some point), detachable pressing plates (for easier cleaning), handles that stay cool during use, non-drip edge (the bottom of the pressing plate should not drip on the workbench while pressing). Also make sure you get your hands on one before buying it as some cheese presses are hard to operate and make assembling them a real headache.
Ease of Cleaning
Third factor is Ease of Cleaning. The main part of the press that needs regular cleaning is the pressing plate. You should be able to detach it from the screw mechanism and clean it in water (never use hot water, as this will warp the plastic). It goes without saying that you should not ever put any parts of your press in dishwasher as they can lose their shape or even melt.
Also, remember to brush all residues away from the holes where the whey seeps from during pressing as this reduces wear on those areas. If you have an open bottomed model, do not forget to wash out its lower half clean water several times during each cheesemaking session.
Versatility
Fourth factor is Versatility. Some cheese presses only let you press the wheel of cheese into one specific shape, which can limit your creativity or maybe even not be appropriate for the type of cheese you are preparing. Look for a model that lets you choose between flat wheels and pressed blocks with all kinds of cross-sectional shapes.
Also it should have an adjustable pressure operating mechanism so you can adjust the yield depending on how dry or moist you want your cheese to be.
Material
Last but not least material. There are three main types of materials used in manufacturing cheese presses: wood, metal and plastic. Metal presses are most popular as they are sturdy, long lasting and have no problem dealing with high temperatures needed for sterilizing them.
Plastic presses are usually cheaper and quicker to manufacture, but they wear out quicker and cannot be sterilized as easily. Wooden cheese presses can be made from many different types of wood: hardwood is the most durable, followed by softwood and finally man-made boards such as plywood or medium density fiberboard (MDF).
The Follower
The press follower is another factor to guide you. They are round in shape, and you use them to press the cheese curd down when forming the mold. It must be a balanced follower, as this will affect the shape of your cheese.
The Price
Cheese press comes in different shapes and sizes. They, therefore, vary in price. So while selecting, be sure to get one that fits comfortably into your budget and does the job efficiently.
How to Use a Cheese Press?
Introduction: A cheese press is a tool used in cheesemaking to get the whey out of the curd, and compress it into a solid form. It consists of two slabs with holes in them that are stacked on top of each other. The bottom slab will have holes, while the top one usually does not so that it can be slid off easily when it’s time to eat the cheese.
There are many different types of presses you can buy or make at home, but today we’ll just focus on how to use an affordable Cheese Press made by PetriStor Design found here.
Preparing Your Milk
1) Line your 2-liter plastic jug with cheesecloth. Place four layers down the length of the jug, and four layers across the width of the jug.
2) Fill your plastic jug with milk to about an inch from the top.
3) Place a small pot on low heat, and place your plastic jug of milk inside it. Warm up your milk to 86 degrees Fahrenheit (30 degrees Celsius). This might take about 20 minutes depending on how powerful your heat source is, so be sure to check on it regularly.
Make sure you don’t overheat or burn your milk! Also make sure that the bottom of the container doesn’t touch the heating element, as this could cause uneven heating and ruin all that fiber we just worked so hard to line our container with!
4) Dump out any excess milk gently so as to leave about a cup of milk inside the container. You can use this excess to replace any measurements that you may have lost from dumping out your extra milk.
Adding Rennet
5) Now we’re going to add 1/4 tsp (1ml) of cheese rennet . If you’ve never worked with rennet before, it’s an enzyme that is used in cheesemaking to separate the curd from the whey. It comes in liquid or tablet form, but our friends at Kähler Design only sell their rennet as a liquid concentrate so I’ll be using that here. Carefully drop 1/4 tsp into your reserved cup of milk and agitate until mix completely disolved. Let it sit for about 2 minutes.
6) Pour rennet mixture into your container of milk, and stir with a wire whisk for at least one full minute. You want to mix this well so that it incorporates evenly into your milk.
Cover the container with the lid, or if you have something that will cover it tightly then use that. This is to keep any dust or debris from getting into the milk and possibly infecting it while we wait for our curd to firm up. We’ll leave this be for 30-45 minutes (30 minutes if you used cold water and/or lemon juice in step #2, 45 minute if not.) “What’s happening during those 30ish minutes?”, you ask?
The rennet we added is going to cause the milk proteins to start separating into curd and whey, much like when you cook an egg for a frittata. The difference here is that we don’t need to wait for our eggs to finish cooking because it’s not heat that’s causing this reaction; It’s the rennet we added!
Curdling Complete
7) After 30-45 minutes have passed, check on your curd and see if it has fully coagulated (set up). This will be pretty obvious: the liquid whey should no longer be translucent and separated from the solid mass of curd. If it hasn’t set up yet, leave it sit for another 5-10 minutes and then check again. Once it has properly coagulated, move on to the next step.
Cutting the Curds
8) Take a knife and cut the curds into 1/4″ pieces as shown below. This is going to help release some of the whey from the solid mass so we can start pressing it soon enough!
9) Stir your curds gently for about one minute, then put the lid back on and let it be for another ten minutes or until you notice that your curds have settled somewhat and there is more liquid whey than before. Do not disturb your curd too much at this stage if you want them to maintain their firmness that we worked so hard to achieve! If they become too soft during this time, then we’ll end up with a softer cheese in the end and that’s not what we’re looking for.
Pressing the Curds
10) Take your cheesecloth and line your colander or strainer. Pour your curd/whey mixture into this colander. Make sure to make use of all of that great whey you’ve collected! (You can drink it like cows do!)
11) Twist the cloth tightly still containing your curds. Then wring out as much excess liquid from the mass as possible. Just keep squeezing and wringing until you no longer get any more liquid out!
You should now have something that looks like what’s pictured below: a solid ball of cheese and some excess whey.
How To Make A Cheese Press?
Perhaps, you do not want to buy a cheese press, maybe due to funds or something else; well, we also got you covered. You can make your cheese press, and we are going to show you how in these simple steps.
1. Get the required tools and materials.
For this project, you would need 5 wood pieces, 2 all-thread rods, 2 wingnuts, 6 washers, 4 nuts, and 2 lock washers. You also need springs, screws, card stock, cheese mold, and a cutting board. You can also get unscented mineral oil.
The tools you will be needing are saws, ruler, sandpaper, small square, scale, drill and bits, pencil and a pen,
2. Build the frame
You would be needing a base (7″ by 5″ diameter) and two bars (7″ by 1 ⅜”); you can use whatever dimensions you want. Start by drilling holes into the three boards at the ends.
This should be wide enough to fit in the threaded rod. Afterward, use the sandpaper to finetune the wood pieces and then apply mineral oil for the finishing. Now assemble the pieces using the threaded rod to pass through them to form a sandwich. Your frame is ready.
3. Assemble the scale
For the scale, you need the right springs. Take your card stock, cut out a strip. The strip should be long enough to hang just below the last bar when the springs are not compressed.
Next, attach the spring to the top bar using a wood screw. Mark lines down the scale taking note of when the pressure is at 5lbs down to 50 lbs. Do this with a difference of 5lbs interval.
4. The followers
Take the plastic cutting board and trace a circle on it. Do this from the inner cut end of your plastic mold. Next, use a jigsaw to cut this out a little wider and then sand it into the shape you traced. This is for the piece on top of the cheese curds.
Now take the last two wooden pieces and make circles smaller in diameter than the plate above. This follower will serve as the height separating the top plate from the bottom bar. You can also use food cans to do this rather than making wooden followers.
FAQ’s
1. What does a cheese press do?
A cheese press is used for making pressed cheese such as Gouda, Cheddar, Monterey Jack, and Parmesan. These are hard cheese types; you can also use them in making soft and semi-soft cheese.
2. Do you need a cheese press to make cheese?
No, you don’t. For making soft cheese, you do not need a cheese press. But when making a hard-pressed cheese like Gouda, Cheddar, Monterey Jack, and Parmesan, then you need a cheese press.
3. What equipment do I need to make cheese?
To make soft cheese at home, you need a large pot, strainer, long knife, cheesecloth, basket, milk thermometer, etc. For hard cheese, you need a cheese press.
Conclusion
Making cheese can be fun with or without a cheese press. However, cheese presses are essential if you want to take your cheese-making game a step further; you need them for hard cheeses like Parmesan and the likes.
Yes, we know there are several products out there, and you are wondering the best cheese press to get. Worry no more; we have listed the 7 bests for you to select. Perhaps, you want to make your cheese press; well, we also have something for you above. So, what will it be; are you buying or making your cheese press?
See also:
Leave a Reply